
- You are here:
- Home »
- Indoor Plants
- » Bishop’s Cap Care Guide

Bishop’s Cap Care Guide
Indoor plants have long been cherished for their ability to bring a touch of nature into our homes, enhancing both the aesthetic appeal and the air quality. Among the myriad of options available, Bishop’s Cap stands out as a distinctive and captivating choice. In this comprehensive guide, we delve into the world of Bishop’s Cap, exploring its botanical characteristics, historical significance, common names, varieties, and much more.
Contents
- 1 What Is Bishop’s Cap?
- 2 Botanical Characteristics
- 3 Historical And Cultural Significance
- 4 Common Names And Varieties
- 5 Light Requirements
- 6 Soil Requirements
- 7 Temperature Requirements
- 8 Humidity Requirements
- 9 Watering Needs For Bishop’s Cap
- 10 Fertilization
- 11 How To Plant Bishop’s Cap
- 12 Potting
- 13 Pruning Techniques For Bishop’s Cap
- 14 Propagation Methods For Bishop’s Cap
- 15 Troubleshooting Problems With Planting Bishop’s Cap Indoors
- 16 Conclusion
- 17 FAQS
What Is Bishop’s Cap?
Bishop’s Cap, scientifically known as Astrophytum myriostigma, is a species of cactus native to Mexico. It belongs to the family Cactaceae, characterized by its striking appearance and low maintenance requirements, making it a popular choice for indoor cultivation. The plant derives its common name, Bishop’s Cap, from the distinctive shape of its stem, which resembles the traditional headgear worn by bishops in certain religious ceremonies.
Botanical Characteristics
Morphology
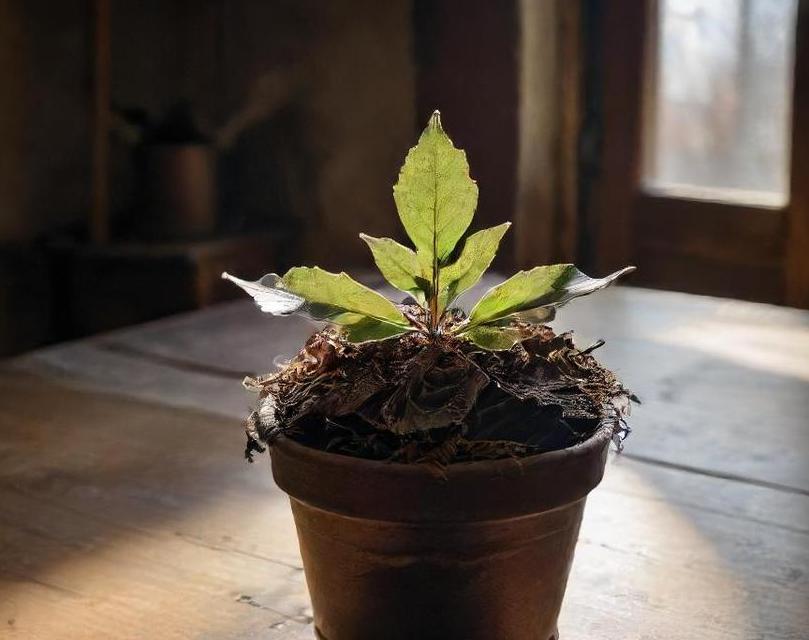
Bishop’s Cap is renowned for its unique morphology, which sets it apart from other members of the cactus family. The plant typically features a solitary, globular stem that can reach heights of up to 20 inches (50 cm) and diameters of 6 inches (15 cm). The stem is covered in numerous white or yellowish woolly areoles, from which clusters of small, yellow spines emerge. These spines serve both as a defense mechanism against herbivores and as structures for reducing water loss through transpiration.
Flowers
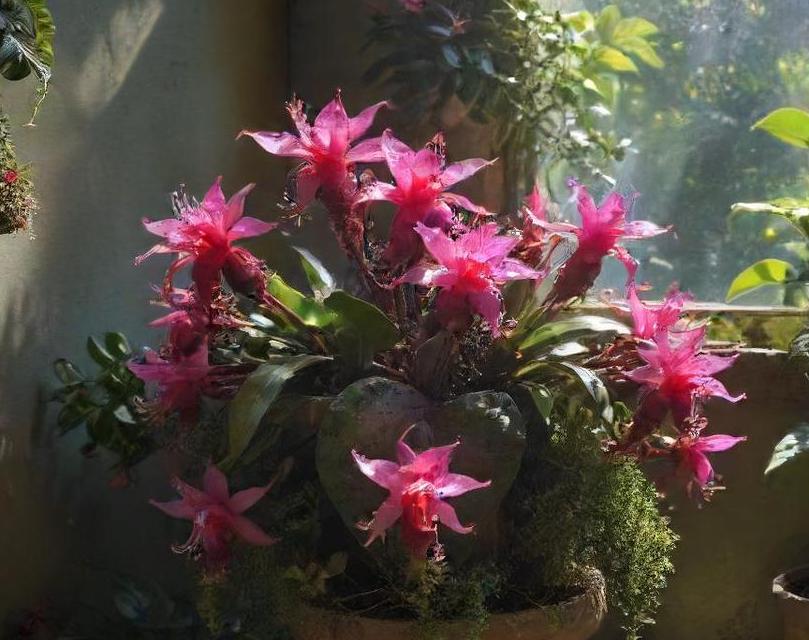
During the spring and summer months, Bishop’s Cap produces exquisite, star-shaped flowers that add to its ornamental value. These flowers, which measure around 2 inches (5 cm) in diameter, can vary in color from creamy white to pale yellow, often with a delicate blush of pink or red at the base of the petals. The blossoms emerge from the areoles near the apex of the stem, creating a stunning contrast against the plant’s greenish-gray epidermis.
Fruits And Seeds
Following pollination, Bishop’s Cap develops small, spherical fruits that contain numerous tiny seeds. These fruits typically ripen in late summer to early fall, exhibiting hues of red or orange when fully mature. The seeds, which are dispersed by wind or animals, contribute to the plant’s reproductive success and play a vital role in sustaining its population in the wild.
Growth Habits
Bishop’s Cap is renowned for its slow growth rate, which is characteristic of many cactus species. Under optimal conditions, it may take several years for the plant to reach maturity and begin flowering. However, once established, Bishop’s Cap can thrive for decades with minimal care, making it a long-lasting and rewarding addition to any indoor garden.
Historical And Cultural Significance
Indigenous Uses
In its native habitat of central and northern Mexico, Bishop’s Cap has been utilized by indigenous communities for various purposes. Historically, certain indigenous groups have employed the plant’s stems and fruits as a source of food and water during times of scarcity. Additionally, Bishop’s Cap has ceremonial significance in some indigenous cultures, where it is revered as a symbol of resilience and endurance in harsh desert environments.
Symbolism
Beyond its practical uses, Bishop’s Cap holds symbolic significance in different cultural contexts. In Mexican folklore, the cactus is often associated with themes of protection, healing, and spiritual guidance. Its resilient nature and ability to thrive in arid conditions have led many to interpret Bishop’s Cap as a symbol of strength and perseverance in the face of adversity.
Horticultural Interest
Bishop’s Cap first gained prominence in the horticultural world during the late 19th and early 20th centuries, when botanical collectors began to explore the deserts of Mexico in search of rare and exotic species. The plant’s distinctive appearance and relative rarity in cultivation sparked interest among enthusiasts and collectors, leading to its eventual introduction into the global market as a prized ornamental species.
Common Names And Varieties
Common Names
In addition to its scientific name, Astrophytum myriostigma, Bishop’s Cap is known by various common names in different regions and languages. Some of the most widely used names include:
- Bishop’s Cap Cactus
- Bishop’s Mitre Cactus
- Bishop’s Hat Cactus
- Bishop’s Hood Cactus
These names allude to the plant’s resemblance to the traditional headgear worn by bishops, highlighting its distinctive shape and cultural associations.
Varieties
While Bishop’s Cap is primarily represented by the species Astrophytum myriostigma, several cultivated varieties and hybrids have been developed by horticulturists and collectors. These variations often exhibit subtle differences in color, spine arrangement, and flower morphology, adding to the diversity and allure of this captivating plant. Some notable varieties include:
- Astrophytum myriostigma ‘Onzuka’ – characterized by its elongated tubercles and dense spination.
- Astrophytum myriostigma ‘Quadricostatum’ – distinguished by its four prominent ribs and minimal woolly covering.
- Astrophytum myriostigma ‘Fukuryu’ – renowned for its peculiar crested or “brain-like” growth habit, which results from genetic mutations.
Each variety offers a unique aesthetic appeal, attracting collectors and enthusiasts seeking to expand their cactus collection with rare and unusual specimens.
Bishop’s Cap stands as a remarkable example of the beauty and resilience found within the plant kingdom. With its distinctive morphology, ornamental flowers, and rich cultural history, this captivating cactus has captured the hearts of enthusiasts and collectors around the world. Whether admired for its striking appearance or cherished for its symbolic significance, Bishop’s Cap continues to enchant and inspire all who encounter it, serving as a testament to the enduring allure of nature’s wonders.
Light Requirements
Bishop’s Cap, also known as Bishop’s Hat or Bishop’s Miter, is a species of cactus native to the deserts of Mexico. Its name derives from the shape of its stem, which resembles the mitre or hat worn by bishops in some religious traditions. This plant belongs to the genus Astrophytum, which comprises several species of small to medium-sized, globular or columnar cacti.
One of the most distinctive features of Bishop’s Cap is its ribbed, star-shaped stem, which is adorned with clusters of white or yellowish flecks known as "tubercles." These tubercles give the plant a striking appearance and serve as the location of its small, yellow flowers that bloom in spring and summer.
Bishop’s Cap is prized by collectors for its aesthetic appeal and relatively slow growth rate, making it an excellent choice for indoor cultivation. With proper care, this resilient succulent can thrive in a variety of indoor settings, adding a touch of desert beauty to your home or office space.
Like many desert-dwelling plants, Bishop’s Cap thrives in bright, indirect sunlight. When grown indoors, it is essential to place your Bishop’s Cap in a location where it can receive ample natural light throughout the day. Ideally, position the plant near a south or west-facing window where it can benefit from several hours of sunlight.
While Bishop’s Cap requires plenty of light to thrive, it is crucial to avoid exposing it to direct sunlight, especially during the intense midday hours. Direct sunlight can scorch the delicate tissues of the plant, leading to sunburn and irreversible damage. If direct sunlight is unavoidable, consider diffusing the light with sheer curtains or placing the plant slightly away from the window to prevent overheating.
If natural light is limited in your indoor space, you can supplement with artificial grow lights to ensure adequate illumination for your Bishop’s Cap. Choose full-spectrum LED grow lights designed for succulents and cacti, and position them above the plant at a distance of 6 to 12 inches to mimic the intensity of sunlight.
Regularly rotate your Bishop’s Cap to ensure even exposure to light on all sides and prevent it from leaning or stretching towards the light source. Observing the plant’s growth and adjusting its position accordingly will help maintain its compact, symmetrical shape and vibrant appearance.
Soil Requirements
Proper soil composition is crucial for the health and well-being of Bishop’s Cap. Like other cacti and succulents, Bishop’s Cap thrives in well-draining soil that allows excess moisture to escape quickly, preventing root rot and other water-related issues. A specialized cactus or succulent potting mix is ideal for Bishop’s Cap, as it provides the perfect balance of drainage and aeration.
When selecting or preparing soil for your Bishop’s Cap, opt for a mix that consists of coarse sand, perlite, or pumice blended with a nutrient-rich organic material such as compost or peat moss. This combination ensures optimal moisture retention while preventing waterlogged conditions that can lead to root rot.
Before repotting or planting your Bishop’s Cap, ensure that the container has sufficient drainage holes at the bottom to allow excess water to escape freely. Plant the Bishop’s Cap in the prepared soil mix, ensuring that the roots are evenly spread and not compacted. Avoid burying the stem too deeply, as this can increase the risk of stem rot and fungal diseases.
During the growing season, which typically spans from spring to early fall, water your Bishop’s Cap sparingly, allowing the soil to dry out completely between waterings. In winter, reduce watering frequency to prevent the plant from sitting in overly moist soil, which can promote fungal growth and root rot.
Temperature Requirements
Bishop’s Cap is well adapted to thrive in the warm temperatures of its native desert habitat, making it well-suited for indoor cultivation in most temperate climates. As a general rule, aim to maintain temperatures between 65°F and 85°F (18°C to 29°C) during the growing season to promote healthy growth and flowering.
During the winter months, when Bishop’s Cap enters a period of dormancy, it can tolerate slightly cooler temperatures ranging from 50°F to 60°F (10°C to 15°C). However, it is essential to protect the plant from frost and extreme cold, as prolonged exposure to freezing temperatures can cause irreversible damage.
To ensure optimal temperature conditions for your Bishop’s Cap, position it in a location where it can benefit from consistent warmth and protection from drafts or sudden temperature fluctuations. Avoid placing the plant near air conditioning vents, radiators, or drafty windows, as these can subject it to stress and adversely affect its growth.
If you live in a region with harsh winters or fluctuating temperatures, consider bringing your Bishop’s Cap indoors during the colder months to shield it from the elements. Provide supplemental warmth using a space heater or heat mat, especially if temperatures drop below the plant’s tolerance threshold.
Humidity Requirements
Bishop’s Cap, like most desert plants, thrives in low humidity environments and is well adapted to withstand dry conditions. When grown indoors, maintaining moderate to low humidity levels is essential for preventing moisture-related issues such as fungal diseases and rot.
To create an optimal microclimate for your Bishop’s Cap, avoid placing it in areas of high humidity, such as bathrooms or kitchens, where moisture levels are typically elevated. Instead, choose a well-ventilated location with good air circulation to promote evaporation and prevent the buildup of excess moisture around the plant.
During periods of high humidity, such as summer or rainy seasons, take precautions to minimize moisture exposure to your Bishop’s Cap by avoiding overhead watering and allowing the soil to dry out completely between waterings. Additionally, refrain from misting the plant, as this can increase humidity levels around the foliage and create an environment conducive to fungal growth.
If you live in a particularly humid climate or struggle to maintain low humidity indoors, consider using a dehumidifier or placing a moisture-absorbing agent such as silica gel or clay granules near your Bishop’s Cap to help regulate humidity levels.
Bishop's Cap is a captivating addition to any indoor plant collection, offering a unique blend of beauty and resilience that makes it well-suited for cultivation in a variety of indoor environments. By understanding and meeting its light, soil, temperature, and humidity requirements, you can ensure that your Bishop's Cap thrives and flourishes year-round.

Provide ample bright, indirect sunlight, well-draining soil, and moderate temperatures to promote healthy growth and flowering. Keep humidity levels low and avoid overwatering to prevent moisture-related issues and maintain the plant's overall vigor.

With proper care and attention to its specific needs, Bishop's Cap can reward you with years of beauty and enjoyment, serving as a stunning centerpiece or focal point in your indoor garden. Whether you're a seasoned plant enthusiast or a novice gardener, adding a Bishop's Cap to your collection is sure to enhance your indoor living space with its distinctive charm and elegance.
Watering Needs For Bishop’s Cap
Bishop’s Cap, scientifically known as Astrophytum myriostigma, is a striking succulent plant originating from Mexico. Known for its unique appearance, this plant belongs to the Cactaceae family and is a popular choice for indoor gardening enthusiasts. Its name is derived from the distinctive markings on its stem, resembling the shape of a bishop’s mitre or cap. With proper care and attention, Bishop’s Cap can thrive indoors, adding beauty and charm to any living space.
Watering is a crucial aspect of caring for Bishop’s Cap, as it is for any succulent. Understanding the plant’s water requirements is essential to prevent overwatering, which can lead to root rot, or underwatering, which can cause dehydration and wilting.
- Frequency:
- Bishop’s Cap thrives in well-draining soil and prefers infrequent but thorough watering. Water the plant only when the top inch of the soil feels dry to the touch.
- During the active growing season in spring and summer, water more frequently, approximately once every two weeks. In contrast, reduce watering during the dormant period in fall and winter to once a month.
- Watering Technique:
- When watering, ensure that water reaches the roots by thoroughly soaking the soil until water drains out from the bottom of the pot.
- Avoid wetting the plant’s body, especially the delicate cap-like markings, as excess moisture can lead to rot and fungal diseases.
- Drainage:
- Proper drainage is essential for Bishop’s Cap to prevent waterlogged soil. Choose a pot with drainage holes at the bottom to allow excess water to escape freely.
- Use a well-draining soil mix tailored for cacti and succulents, or amend regular potting soil with sand or perlite to improve drainage.
- Monitoring:
- Regularly monitor the soil moisture levels and adjust the watering frequency accordingly based on environmental conditions such as temperature and humidity.
- During hot, dry weather, Bishop’s Cap may require more frequent watering to prevent dehydration.
Fertilization
Fertilizing Bishop’s Cap is essential for promoting healthy growth and blooming, but it’s crucial to do so sparingly to avoid over-fertilization, which can harm the plant.
- Fertilizer Type:
- Use a balanced, water-soluble fertilizer formulated specifically for cacti and succulents, or a fertilizer with a low nitrogen content.
- Alternatively, opt for a specialized succulent fertilizer that provides essential nutrients without risking nutrient imbalances.
- Application Frequency:
- Fertilize Bishop’s Cap during the active growing season, typically from spring to early fall, when the plant is actively producing new growth.
- Apply fertilizer sparingly, diluting it to half or quarter strength to avoid overfeeding the plant. Fertilize once every four to six weeks during the growing season.
- Timing:
- Apply fertilizer to moist soil to prevent root burn and ensure proper absorption of nutrients.
- Avoid fertilizing Bishop’s Cap during the dormant period in fall and winter, as the plant’s growth slows down, and it requires fewer nutrients.
- Observation:
- Monitor the plant for signs of nutrient deficiencies or excesses, such as yellowing or browning of the leaves, which may indicate a need to adjust the fertilizer regimen.
How To Plant Bishop’s Cap
Planting Bishop’s Cap involves several steps to ensure optimal growth and establishment in its new environment. Whether starting from seeds or transplanting a mature plant, proper planting techniques are essential for the plant’s health and vigor.
- Seed Propagation:
- If starting Bishop’s Cap from seeds, sow the seeds in a well-draining cactus mix in shallow containers.
- Lightly press the seeds into the soil surface and mist gently with water to moisten the soil.
- Place the containers in a warm, bright location with indirect sunlight, maintaining consistent moisture levels until germination occurs, usually within two to four weeks.
- Transplanting:
- When transplanting Bishop’s Cap into a larger container, choose a pot with drainage holes and fill it with well-draining cactus or succulent mix.
- Carefully remove the plant from its current container, taking care not to damage the roots.
- Gently loosen the roots and place the plant in the center of the new pot, adding additional soil mix around the roots to fill any gaps.
- Firmly press the soil around the base of the plant to provide stability and water thoroughly to settle the soil.
- Light Requirements:
- Bishop’s Cap thrives in bright, indirect sunlight, making it ideal for placement near a sunny window or under grow lights.
- Avoid placing the plant in direct sunlight for extended periods, as intense sunlight can scorch the delicate foliage.
- Temperature and Humidity:
- Bishop’s Cap prefers warm temperatures ranging from 70°F to 90°F (21°C to 32°C) during the day and slightly cooler temperatures at night.
- Maintain moderate humidity levels around the plant, but ensure good air circulation to prevent fungal diseases.
Potting
Choosing the right pot and potting mix is essential for Bishop’s Cap to thrive in indoor environments. Proper potting provides adequate support, drainage, and space for root development, promoting healthy growth and preventing issues such as root rot.
- Pot Selection:
- Select a pot with drainage holes at the bottom to allow excess water to escape freely and prevent waterlogging.
- Choose a pot that provides ample room for the plant’s roots to grow, allowing at least an inch of space around the root ball.
- Potting Mix:
- Use a well-draining potting mix specifically formulated for cacti and succulents, or create a custom mix by combining equal parts of regular potting soil, coarse sand, and perlite.
- Avoid using heavy, moisture-retentive soils that can lead to waterlogged conditions and root rot.
- Repotting:
- Repot Bishop’s Cap into a slightly larger container when its roots outgrow the current pot or when the plant becomes root-bound.
- Repotting is best done in spring or early summer when the plant is actively growing and can quickly recover from the transplant shock.
- Maintenance:
- Regularly inspect the pot for signs of soil compaction or salt buildup on the surface, which can hinder drainage and nutrient absorption.
- Every few years, refresh the potting mix by repotting Bishop’s Cap into fresh soil to replenish nutrients and ensure optimal growing conditions.
Bishop’s Cap is a captivating indoor plant known for its distinctive appearance and low-maintenance care requirements. With proper watering, fertilization, planting, and potting techniques, this unique succulent can thrive in indoor environments, adding beauty and charm to any living space. By understanding and meeting the plant’s needs, gardening enthusiasts can enjoy the beauty of Bishop’s Cap for years to come.
Pruning Techniques For Bishop’s Cap
Bishop’s Cap (Astrophytum myriostigma), also known as Bishop’s Hat or Bishop’s Miter, is a fascinating and visually appealing succulent plant native to Mexico. Its unique appearance, with star-shaped ribs and distinctive patterns resembling the vestments of a bishop, makes it a popular choice for indoor plant enthusiasts. The Bishop’s Cap is relatively easy to care for, making it suitable for both beginner and experienced gardeners alike.
Pruning is an essential aspect of Bishop’s Cap care, helping to maintain its aesthetic appeal and promote healthy growth. Here are some pruning techniques to consider:
1. Removal Of Dead Or Damaged Tissue
Regularly inspect your Bishop’s Cap plant for any signs of dead or damaged tissue, such as discolored or shriveled stems. Use sterilized pruning shears to carefully remove these unhealthy parts, cutting them back to healthy tissue to prevent the spread of disease.
2. Controlling Growth
Bishop’s Cap plants can grow quite slowly, but occasional pruning can help control their size and shape. Trim back any excessive growth to maintain a compact and symmetrical appearance. Focus on removing elongated stems or offsets that detract from the plant’s overall form.
3. Promoting Air Circulation
Pruning can also help improve air circulation around the Bishop’s Cap plant, reducing the risk of fungal diseases and pest infestations. Remove any dense clusters of stems or offsets that inhibit airflow, allowing for better ventilation within the plant canopy.
4. Shaping
If you desire a particular shape or form for your Bishop’s Cap plant, pruning can help achieve this goal. Carefully trim back stems to encourage branching or sculpt the plant into your desired shape. Take care not to remove too much foliage at once, as this can stress the plant.
Propagation Methods For Bishop’s Cap
Propagation is an excellent way to expand your Bishop’s Cap collection or share plants with friends and fellow enthusiasts. Here are some propagation methods to try:
1. Offsets
Bishop’s Cap plants produce offsets, or "pups," around the base of the main plant. These offsets can be carefully removed and propagated to create new plants. To propagate using offsets, follow these steps:
- Select a healthy offset that is at least a few inches tall and has its own root system.
- Gently remove the offset from the main plant, taking care not to damage its roots.
- Allow the offset to callus over for a day or two to prevent rotting.
- Plant the offset in a well-draining potting mix, ensuring that the soil is lightly moist.
- Place the newly potted offset in a bright, indirect light location and water sparingly until roots establish.
2. Seeds
Bishop’s Cap plants produce small, round seeds that can be harvested and sown to grow new plants. To propagate using seeds, follow these steps:
- Collect ripe seeds from mature Bishop’s Cap fruits, which typically develop after the plant has flowered.
- Sow the seeds in a shallow tray filled with well-draining cactus or succulent soil.
- Gently press the seeds into the soil surface, but do not cover them completely.
- Place the tray in a warm, bright location with indirect sunlight.
- Keep the soil lightly moist but not waterlogged, as excess moisture can cause rotting.
- Germination may take several weeks to months, so be patient and continue to provide optimal growing conditions.
3. Stem Cuttings
While less common, Bishop’s Cap can also be propagated from stem cuttings. To propagate using stem cuttings, follow these steps:
- Select a healthy stem segment from the main plant, ensuring that it is free from any signs of damage or disease.
- Use a clean, sharp knife or pair of scissors to make a clean cut below a node, where roots will eventually form.
- Allow the cutting to callus over for a day or two to prevent rotting.
- Plant the cutting in a well-draining potting mix, burying the cut end just below the soil surface.
- Place the potted cutting in a warm, bright location with indirect sunlight.
- Water sparingly until roots establish, then gradually increase watering as the plant grows.
Troubleshooting Problems With Planting Bishop’s Cap Indoors
Despite their relatively low maintenance requirements, Bishop’s Cap plants can still encounter issues when grown indoors. Here are some common problems and how to address them:
1. Overwatering
Overwatering is one of the most common issues faced by Bishop’s Cap growers, as these plants are adapted to arid conditions. Symptoms of overwatering include yellowing or wilting of the stems, soft or mushy texture, and root rot. To remedy overwatering:
- Allow the soil to dry out completely between waterings.
- Adjust your watering frequency and reduce the amount of water given to the plant.
- Ensure that the pot has proper drainage to prevent water from accumulating around the roots.
2. Sunburn
Bishop’s Cap plants prefer bright, indirect light, but exposure to intense sunlight can cause sunburn. Symptoms of sunburn include discoloration or browning of the stems and foliage. To prevent sunburn:
- Place the plant in a location with bright, indirect light, such as a south- or west-facing window with sheer curtains for protection.
- Gradually acclimate the plant to direct sunlight if you plan to move it outdoors during the warmer months.
3. Pest Infestations
While relatively resistant to pests, Bishop’s Cap plants can occasionally attract spider mites or mealybugs. Signs of pest infestation include webbing, sticky residue on the foliage, and visible insects on the plant. To control pests:
- Inspect the plant regularly for signs of infestation.
- Remove any affected parts of the plant and dispose of them properly.
- Treat the plant with insecticidal soap or neem oil, following the manufacturer’s instructions carefully.
4. Fungal Diseases
Excessive moisture or poor air circulation can lead to fungal diseases such as powdery mildew or root rot. Symptoms include white powdery patches on the foliage, wilting, and decay of the roots. To prevent fungal diseases:
- Ensure that the plant has proper air circulation by avoiding overcrowding and providing adequate spacing between plants.
- Water the plant at the base to avoid getting the foliage wet.
- Use a well-draining potting mix and avoid overwatering.
Conclusion
Bishop’s Cap is a captivating indoor plant that adds a touch of elegance to any space with its unique appearance and low maintenance requirements. By following the pruning techniques, propagation methods, and troubleshooting tips outlined in this guide, you can successfully cultivate and care for Bishop’s Cap plants indoors. Whether you’re a novice gardener or an experienced plant enthusiast, incorporating Bishop’s Cap into your indoor garden is sure to bring joy and beauty for years to come.
FAQS
What Is A Bishop’s Cap Plant?
Bishop’s Cap, also known as Astrophytum myriostigma, is a species of cactus native to Mexico. It belongs to the Cactaceae family and is characterized by its distinctive star-shaped appearance and dense covering of white or yellowish dots.
How Do I Care For A Bishop’s Cap Plant?
Bishop’s Cap plants require well-draining soil, ample sunlight, and minimal watering. They thrive in bright, indirect light and prefer temperatures between 70-100°F (21-38°C). Water sparingly, allowing the soil to dry out completely between waterings, especially during the plant’s dormant period in winter.
Can Bishop’s Cap Plants Tolerate Low Light Conditions?
While Bishop’s Cap plants prefer bright, indirect light, they can tolerate some degree of low light conditions. However, prolonged exposure to low light may cause the plant to become etiolated (stretched) and affect its overall health and appearance.
How Often Should I Water My Bishop’s Cap Plant?
Watering frequency for Bishop’s Cap plants depends on various factors such as temperature, humidity, and soil type. As a general rule, water sparingly, allowing the soil to dry out completely between waterings. During the plant’s dormant period in winter, reduce watering frequency to prevent root rot.
What Kind Of Soil Is Best For Bishop’s Cap Plants?
Bishop’s Cap plants require well-draining soil to prevent waterlogged conditions, which can lead to root rot. A cactus or succulent potting mix is ideal, as it provides the necessary drainage while retaining some moisture. Adding perlite or sand to the soil mixture can further improve drainage.
Are Bishop’s Cap Plants Prone To Pests And Diseases?
Bishop’s Cap plants are relatively resistant to pests and diseases when grown in optimal conditions. However, they may occasionally attract common houseplant pests such as mealybugs, scale insects, and spider mites. Regularly inspecting the plant for signs of infestation and promptly treating any issues can help prevent pest problems.
How Do I Propagate Bishop’s Cap Plants?
Bishop’s Cap plants can be propagated from seeds or by taking stem cuttings. To propagate from seeds, collect ripe seeds from mature fruits and sow them in a well-draining soil mixture. Keep the soil moist but not waterlogged, and provide warmth and bright, indirect light for germination. To propagate from stem cuttings, allow the cut end to callus over for a few days before planting it in a well-draining soil mix. Keep the soil lightly moist until roots develop.