
- You are here:
- Home »
- Indoor Plants
- » Japanese Bird’s-Nest Fern Care Guide

Japanese Bird’s-Nest Fern Care Guide
Indoor plants have become an essential part of interior design, not just for their aesthetic appeal but also for their numerous health benefits. Among the plethora of options available, the Japanese Bird’s-Nest Fern stands out as a captivating choice. Its lush foliage, unique growth habit, and relatively easy care requirements make it a favorite among plant enthusiasts. In this comprehensive guide, we delve into the intriguing world of the Japanese Bird’s-Nest Fern, exploring its botanical characteristics, historical and cultural significance, common names, varieties, and more.
Contents
- 1 What Is Japanese Bird’s-Nest Fern?
- 2 Botanical Characteristics
- 3 Historical And Cultural Significance
- 4 Common Names And Varieties
- 5 Light Requirements
- 6 Soil Requirements
- 7 Temperature Requirements
- 8 Humidity Requirements
- 9 Watering Needs For Japanese Bird’s-Nest Fern
- 10 Fertilization
- 11 How To Plant Japanese Bird’s-Nest Fern
- 12 Potting
- 13 Pruning Techniques For Japanese Bird’s-Nest Fern
- 14 Propagation Methods For Japanese Bird’s-Nest Fern
- 15 Troubleshooting Problems With Planting Japanese Bird’s-Nest Fern Indoors
- 16 Conclusion
- 17 FAQS
What Is Japanese Bird’s-Nest Fern?
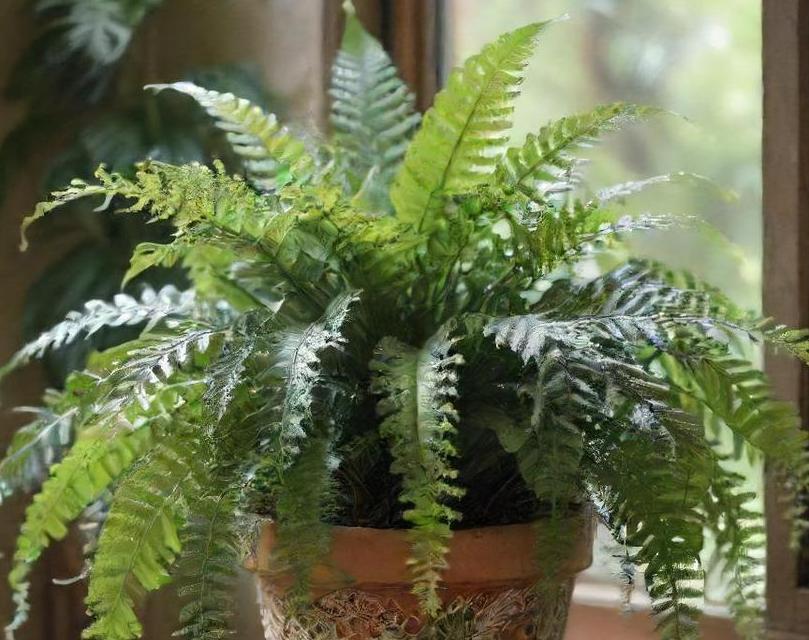
The Japanese Bird’s-Nest Fern, scientifically known as Asplenium antiquum, belongs to the Aspleniaceae family. Originating from Japan and other parts of Asia, this fern is prized for its striking appearance and adaptability to indoor environments. Unlike many ferns, which typically have delicate, lacy fronds, the Japanese Bird’s-Nest Fern boasts broad, glossy leaves arranged in a nest-like rosette formation, hence its name. This unique growth habit adds an exotic touch to any indoor space.
Botanical Characteristics
The Japanese Bird’s-Nest Fern is characterized by its distinct morphology:
-
Fronds: The fronds of this fern are broad, glossy, and leathery, with a dark green hue. They emerge from a central rosette, resembling a bird’s nest, hence the name.
-
Rhizomes: Like most ferns, the Japanese Bird’s-Nest Fern reproduces via rhizomes, underground stems that give rise to new fronds and plants. These rhizomes help the fern spread and colonize its surrounding environment.
-
Size: Depending on the growing conditions and maturity, Japanese Bird’s-Nest Ferns can vary in size. Mature specimens can reach a height and width of up to two feet, making them substantial yet manageable indoor plants.
-
Spores: As with other ferns, the Japanese Bird’s-Nest Fern reproduces via spores, which are produced on the undersides of the fronds. These spores are dispersed into the environment, where they may germinate and give rise to new ferns under suitable conditions.
Historical And Cultural Significance
The Japanese Bird’s-Nest Fern holds cultural significance beyond its botanical characteristics. In Japanese culture, ferns are associated with tranquility, longevity, and prosperity. They are often featured in traditional gardens, where they symbolize harmony with nature and the passage of time.
Moreover, ferns have been utilized for their medicinal properties in various cultures throughout history. While the Japanese Bird’s-Nest Fern is not as widely studied for its medicinal uses as some other fern species, it has been traditionally used in certain folk medicine practices for its purported healing properties.
Common Names And Varieties
The Japanese Bird’s-Nest Fern is known by several common names, reflecting its widespread popularity and recognition:
-
Japanese Bird’s-Nest Fern: This name is derived from the fern’s origin and its distinctive nest-like growth habit.
-
Dwarf Bird’s-Nest Fern: Some varieties of the Japanese Bird’s-Nest Fern are smaller in size, earning them the moniker "dwarf" Bird’s-Nest Fern.
-
Nest Fern: This simplified version of the name is often used colloquially to refer to the Japanese Bird’s-Nest Fern.
-
Spleenwort: Like many ferns, the Japanese Bird’s-Nest Fern belongs to the genus Asplenium, which is sometimes referred to as spleenwort due to its historical medicinal uses related to the spleen.
In addition to the common names, there are several varieties and cultivars of the Japanese Bird’s-Nest Fern, each with its unique characteristics:
-
‘Leslie’ Variety: This variety features particularly broad and glossy fronds, giving it a lush and vibrant appearance.
-
‘Crispy Wave’ Cultivar: The ‘Crispy Wave’ cultivar is known for its wavy fronds, which add an extra dimension of texture and visual interest to the plant.
-
‘Tasselfern’ Variety: Characterized by its finely serrated fronds, the ‘Tasselfern’ variety offers a more delicate and intricate look compared to the broader fronds of other varieties.
The Japanese Bird’s-Nest Fern is a captivating addition to any indoor space, offering both aesthetic beauty and cultural significance. Its unique growth habit, glossy fronds, and relative ease of care make it a popular choice for plant enthusiasts and interior designers alike. Whether adorning a living room, office, or garden, this fern adds a touch of elegance and tranquility to its surroundings. As we continue to appreciate the beauty of indoor plants, the Japanese Bird’s-Nest Fern remains a timeless favorite, cherished for its enduring allure and symbolic resonance.
Light Requirements
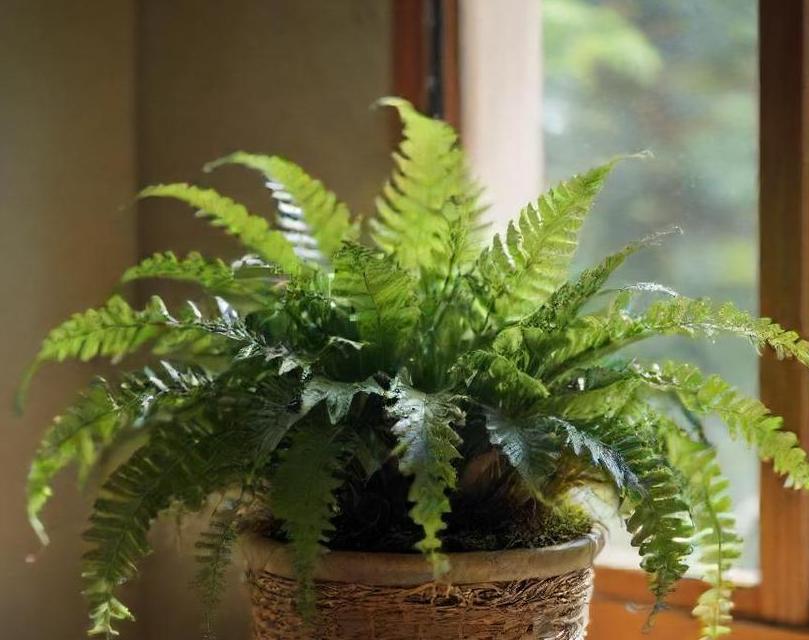
The Japanese Bird’s-Nest Fern, scientifically known as Asplenium nidus, is a captivating and popular indoor plant choice cherished for its striking appearance and ease of care. Originating from the tropical regions of Southeast Asia, this fern species has become a staple in indoor gardens around the world, adding a touch of lush greenery and natural elegance to any interior space.
Renowned for its distinctive nest-like growth habit, with elongated, arching fronds emerging from a central rosette, the Japanese Bird’s-Nest Fern is prized for its ornamental value. Its vibrant green foliage and unique shape make it an eye-catching addition to homes, offices, and public spaces alike. Beyond its aesthetic appeal, this fern species also offers numerous benefits, including air purification and stress reduction, making it a beloved choice among plant enthusiasts and interior decorators.
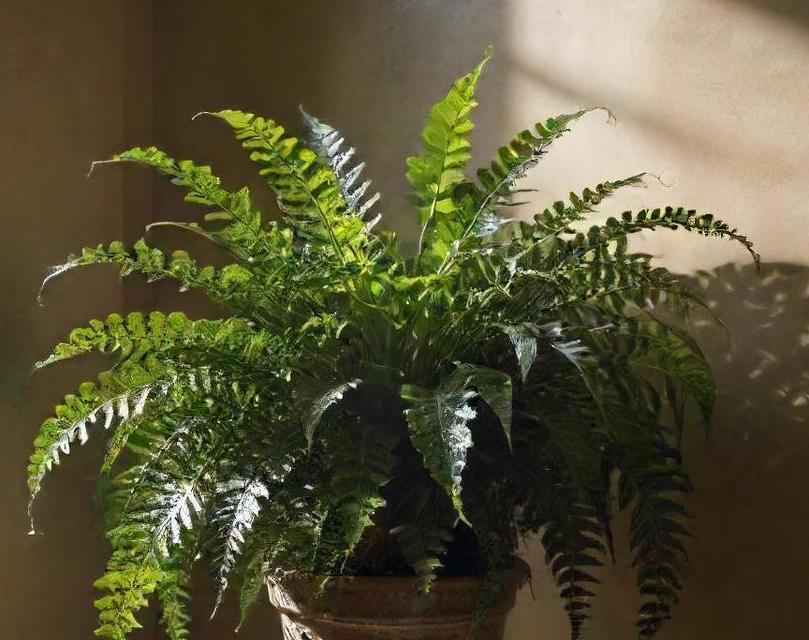
Proper light exposure is crucial for the health and growth of Japanese Bird’s-Nest Ferns. While these ferns thrive in tropical forests where they receive filtered sunlight beneath the canopy, they prefer indirect light when grown indoors.
Ideally, place your fern in a location where it can receive bright, indirect light throughout the day. Avoid exposing it to direct sunlight, as this can scorch the delicate fronds and lead to leaf damage. Inadequate light may result in stunted growth and a loss of vibrancy in foliage.
If your indoor space lacks sufficient natural light, you can supplement with artificial lighting, such as fluorescent or LED grow lights. Position the lights approximately 12 to 18 inches above the fern and keep them on for 10 to 12 hours each day to mimic natural daylight conditions. Rotate the plant periodically to ensure even exposure to light and promote balanced growth.
Observing your fern’s response to light is essential for fine-tuning its placement. If the fronds start to yellow or wilt, it may indicate that the plant is receiving too much sunlight. Conversely, if the foliage appears pale or leggy, it may signal inadequate light exposure. Adjust the positioning accordingly to optimize light levels and maintain the health of your Japanese Bird’s-Nest Fern.
Soil Requirements
Selecting the right soil mixture is essential for providing Japanese Bird’s-Nest Ferns with the necessary nutrients and growing conditions. These ferns thrive in a well-draining, moisture-retentive medium that replicates the organic matter found in their native habitat.
A recommended soil mix for Japanese Bird’s-Nest Ferns consists of a combination of peat moss, perlite, and coarse sand or orchid bark. This blend offers excellent aeration and drainage, preventing waterlogged conditions that can lead to root rot.
When potting or repotting your fern, choose a container with drainage holes to allow excess water to escape freely. Fill the pot with the prepared soil mixture, ensuring that the root ball is positioned at the same level as the surrounding soil. Gently firm the soil around the roots to provide stability while avoiding compacting it too tightly.
Regularly monitor the moisture levels in the soil to prevent it from becoming too dry or waterlogged. Water your fern when the top inch of soil feels slightly dry to the touch, providing enough water to moisten the entire root ball thoroughly. Discard any excess water that accumulates in the saucer beneath the pot to avoid waterlogging.
Temperature Requirements
Japanese Bird’s-Nest Ferns thrive in warm, temperate conditions reminiscent of their tropical origins. Maintaining the appropriate temperature range is essential for promoting healthy growth and preventing stress-related issues.
The ideal temperature range for Japanese Bird’s-Nest Ferns is between 65°F to 75°F (18°C to 24°C) during the day and slightly cooler temperatures of 55°F to 60°F (13°C to 16°C) at night. Avoid exposing the fern to sudden temperature fluctuations or drafts, as these can shock the plant and impair its growth.
During the winter months, when indoor heating may cause the air to become dry, it’s beneficial to increase humidity levels around the fern. This can be achieved by placing a tray filled with water and pebbles beneath the plant or using a humidifier to maintain optimal moisture levels in the air.
In regions where outdoor temperatures drop significantly during the winter, it’s advisable to keep Japanese Bird’s-Nest Ferns indoors or provide adequate protection if placed outside. Frost can damage or kill the delicate foliage, so it’s essential to shield the plant from cold drafts and extreme temperature changes.
Humidity Requirements
High humidity is essential for the health and vitality of Japanese Bird’s-Nest Ferns, as they originate from the moist, humid environments of tropical forests. Adequate humidity levels help prevent the foliage from drying out and maintain the fern’s lush appearance.
Indoor environments often have lower humidity levels, particularly during the winter months when heating systems are in use. To create a suitable microclimate for your fern, increase humidity levels around the plant by employing various methods:
-
Misting: Regularly mist the foliage with water to increase humidity and hydrate the fronds. Use a fine mist sprayer to avoid soaking the leaves excessively, as this can promote fungal diseases.
-
Humidifiers: Place a humidifier near the fern to add moisture to the surrounding air. Set the humidifier to maintain humidity levels between 50% to 80%, replicating the conditions of its natural habitat.
-
Pebble Tray: Fill a shallow tray with pebbles and water, then place the pot on top of the pebbles. As the water evaporates, it creates a humid microclimate around the fern.
-
Grouping Plants: Cluster indoor plants together to create a more humid environment through transpiration. The collective moisture released by multiple plants can raise humidity levels in the vicinity.
By incorporating these humidity-boosting techniques into your care routine, you can create an optimal environment for your Japanese Bird’s-Nest Fern to thrive and flourish.
Japanese Bird's-Nest Ferns are prized for their striking appearance, ease of care, and numerous benefits for indoor environments. By understanding and meeting their specific requirements for light, soil, temperature, and humidity, you can cultivate healthy and vibrant ferns that enhance the beauty of your home or office.

When selecting a location for your fern, prioritize bright, indirect light to promote robust growth without risking leaf damage. Choose a well-draining soil mix and provide adequate moisture to ensure optimal hydration for the roots. Maintain a consistent temperature range and high humidity levels to mimic the fern's native tropical habitat.

With proper care and attention to detail, your Japanese Bird's-Nest Fern can thrive indoors, delighting you with its lush foliage and graceful presence for years to come. Incorporate these guidelines into your plant care routine to enjoy the beauty and benefits of this captivating fern species in your indoor space.
Watering Needs For Japanese Bird’s-Nest Fern
The Japanese Bird’s-Nest Fern, scientifically known as Asplenium nidus, is a stunning and popular choice among indoor plant enthusiasts. Native to tropical regions like Southeast Asia, Australia, and the Pacific Islands, this fern is revered for its lush, glossy fronds that resemble a bird’s nest, hence its name. Its elegant appearance and relatively low maintenance requirements make it a favorite for indoor gardens, adding a touch of exotic beauty to any space.
Japanese Bird’s-Nest Ferns thrive in warm, humid environments with indirect light, making them ideal for indoor cultivation.
Proper watering is crucial for the health and vitality of Japanese Bird’s-Nest Ferns. These plants prefer consistently moist but not waterlogged soil. Overwatering can lead to root rot and other issues, while underwatering can cause the fronds to wilt and become dry.
To water your Japanese Bird’s-Nest Fern effectively, follow these guidelines:
-
Frequency: Water your fern when the top inch of the soil feels slightly dry to the touch. Depending on factors such as temperature, humidity, and pot size, this typically translates to watering every 1-2 weeks.
-
Watering Technique: Use room temperature water to avoid shocking the plant. Water the soil around the base of the fern rather than directly onto the fronds to prevent water from accumulating in the center of the plant, which can promote rot.
-
Drainage: Ensure that your pot has adequate drainage holes to allow excess water to escape. Standing water at the bottom of the pot can lead to root rot.
-
Humidity: Japanese Bird’s-Nest Ferns thrive in high humidity environments. To increase humidity around the plant, you can mist the fronds regularly or place a humidity tray filled with water and pebbles beneath the pot.
-
Avoid Overwatering: Monitor the soil moisture levels carefully and avoid overwatering, as this can lead to root rot. If the soil feels consistently wet or soggy, reduce the frequency of watering.
By following these watering guidelines, you can ensure that your Japanese Bird’s-Nest Fern remains healthy and vibrant.
Fertilization
While Japanese Bird’s-Nest Ferns are not heavy feeders, periodic fertilization can help promote healthy growth and vibrant foliage. During the growing season, which typically spans from spring to early autumn, you can fertilize your fern once a month.
Here are some tips for fertilizing your Japanese Bird’s-Nest Fern:
-
Choose a Balanced Fertilizer: Select a balanced, water-soluble fertilizer specifically formulated for houseplants. Look for a fertilizer with an N-P-K ratio (nitrogen, phosphorus, potassium) of around 10-10-10 or similar.
-
Dilution: Always dilute the fertilizer to half or quarter strength to avoid overfeeding, which can damage the delicate roots of the fern. Follow the manufacturer’s instructions for dilution ratios carefully.
-
Application: Apply the diluted fertilizer to the soil around the base of the fern, taking care to avoid getting it on the foliage. Water the plant after fertilizing to help distribute the nutrients evenly.
-
Frequency: Fertilize your Japanese Bird’s-Nest Fern once a month during the growing season. Reduce or suspend fertilization during the winter months when the plant is in a dormant phase.
-
Monitor Growth: Pay attention to the growth and appearance of your fern. If it shows signs of slow growth or pale foliage, it may benefit from more frequent fertilization. Conversely, if the foliage becomes dark green and lush, reduce the frequency of fertilization.
By providing balanced fertilization during the growing season, you can support the health and vitality of your Japanese Bird’s-Nest Fern, promoting lush foliage and vigorous growth.
How To Plant Japanese Bird’s-Nest Fern
Planting Japanese Bird’s-Nest Ferns is relatively straightforward, but it’s essential to provide the right growing conditions to ensure their success. Follow these steps to plant your fern:
Potting
-
Selecting a Pot: Choose a pot with adequate drainage holes and a diameter that is 1-2 inches larger than the root ball of your fern. Avoid pots that are too large, as excess soil can retain moisture and lead to root rot.
-
Soil Mix: Japanese Bird’s-Nest Ferns prefer a well-draining, peat-based potting mix that retains moisture without becoming waterlogged. You can also add perlite or sand to improve drainage.
-
Preparing the Pot: Fill the bottom of the pot with a layer of small stones or broken pottery to facilitate drainage. Then, add a layer of potting mix, leaving enough space for the root ball of the fern.
-
Planting: Carefully remove the fern from its nursery pot, taking care not to damage the roots. Place the root ball in the center of the pot and fill in the remaining space with potting mix, gently pressing down to secure the plant.
-
Watering: After planting, water the fern thoroughly to settle the soil and hydrate the roots. Ensure that excess water drains freely from the bottom of the pot.
-
Placement: Choose a location for your Japanese Bird’s-Nest Fern that receives bright, indirect light. Avoid placing it in direct sunlight, as this can scorch the delicate fronds. Additionally, maintain a consistent temperature between 60-75°F (15-24°C) for optimal growth.
-
Maintenance: Monitor the moisture levels of the soil and adjust your watering frequency as needed. Additionally, inspect the foliage regularly for signs of pests or disease, and remove any dead or yellowing fronds to promote healthy growth.
By following these steps, you can successfully plant and care for your Japanese Bird’s-Nest Fern, creating a lush and vibrant addition to your indoor garden.
The Japanese Bird's-Nest Fern is a captivating and low-maintenance plant that adds a touch of tropical elegance to any indoor space. With its glossy, nest-like fronds and graceful growth habit, it is sure to become a focal point in your home or office.

By providing the right growing conditions, including proper watering, occasional fertilization, and well-draining soil, you can ensure the health and vitality of your fern for years to come. Whether displayed as a standalone specimen or incorporated into a larger indoor garden, the Japanese Bird's-Nest Fern is sure to delight with its beauty and charm.
Pruning Techniques For Japanese Bird’s-Nest Fern
Japanese Bird’s-Nest Fern (Asplenium nidus) is a stunning tropical plant known for its lush, glossy fronds and unique nest-like growth habit. Originating from Southeast Asia, this fern has gained popularity as an indoor plant due to its low maintenance requirements and ornamental appeal.
Pruning is essential for maintaining the health and appearance of the Japanese Bird’s-Nest Fern. Here are some techniques to keep your fern looking its best:
1. Removing Dead Or Yellowing Fronds
Regularly inspect your fern for dead or yellowing fronds, as these can detract from its overall appearance and indicate underlying health issues. To remove them, use sharp, clean pruning shears and cut the fronds at the base where they meet the main stem. Be sure to discard any diseased or damaged foliage to prevent the spread of pathogens.
2. Trimming Brown Tips
Brown tips on the fronds are often caused by low humidity or overexposure to direct sunlight. To remedy this, use sharp scissors to trim the brown tips, making clean, diagonal cuts. Additionally, consider increasing humidity levels by misting the foliage regularly or placing a humidifier near the plant.
3. Shaping The Plant
Japanese Bird’s-Nest Ferns have a natural, nest-like growth habit, but occasional shaping can help maintain a tidy appearance. Trim any unruly fronds that extend beyond the desired shape of the plant, but be careful not to over-prune, as this can stunt growth.
4. Division
As the Japanese Bird’s-Nest Fern matures, it may become crowded in its container. Dividing the plant allows you to propagate new specimens while also rejuvenating the parent plant. Carefully remove the fern from its pot and gently tease apart the root ball, ensuring each division has several healthy fronds and roots. Repot the divisions into separate containers with fresh potting mix, and water thoroughly.
Propagation Methods For Japanese Bird’s-Nest Fern
Propagation is an excellent way to expand your collection of Japanese Bird’s-Nest Ferns or share them with friends. Here are some effective propagation methods:
1. Spores
Japanese Bird’s-Nest Ferns reproduce through spores, which are tiny structures located on the underside of mature fronds. To collect spores, place a mature frond with ripe spores in a paper bag and shake gently. The spores will fall into the bag, which you can then transfer to a small container filled with sterile potting mix. Keep the soil consistently moist and provide indirect light until the spores germinate and develop into young ferns.
2. Division
As mentioned earlier, division is a simple and reliable method of propagating Japanese Bird’s-Nest Ferns. When dividing a mature plant, ensure each division has a healthy root system and several fronds to support growth. Pot each division in a suitable container with well-draining potting mix, and water thoroughly to encourage root establishment.
3. Rhizome Cuttings
Rhizome cuttings can also be used to propagate Japanese Bird’s-Nest Ferns. Carefully cut a healthy rhizome section from the parent plant using a sharp, sterile knife. Plant the cutting in a small container filled with moist potting mix, burying the rhizome just below the soil surface. Keep the soil consistently moist and provide indirect light until new growth emerges from the cutting.
Troubleshooting Problems With Planting Japanese Bird’s-Nest Fern Indoors
Despite being relatively low-maintenance, Japanese Bird’s-Nest Ferns can encounter a few common problems when grown indoors. Here’s how to troubleshoot and address them:
1. Yellowing Fronds
Yellowing fronds are often a sign of overwatering or insufficient drainage. To remedy this, allow the soil to dry out slightly between waterings and ensure the plant is not sitting in waterlogged soil. Adjusting your watering schedule and repotting the fern into well-draining potting mix can help restore its health.
2. Brown Tips On Fronds
As mentioned earlier, brown tips on the fronds can be caused by low humidity or excessive exposure to direct sunlight. Increase humidity levels by misting the foliage regularly or placing a tray of water and pebbles beneath the pot to create a humid microclimate. Additionally, move the plant to a location with filtered or indirect light to prevent sunburn.
3. Pest Infestations
Japanese Bird’s-Nest Ferns are relatively resistant to pests, but they may occasionally attract mealybugs, scale insects, or spider mites. Inspect the foliage regularly for signs of pest infestation, such as webbing, sticky residue, or visible insects. If pests are present, gently wash the foliage with a mild soap solution or insecticidal soap, paying close attention to the undersides of the fronds. Repeat as necessary until the infestation is controlled.
4. Fungal Diseases
Fungal diseases such as root rot can occur if the fern is exposed to excessively moist or poorly drained soil. To prevent fungal infections, ensure the plant is not sitting in waterlogged soil and allow the top layer of soil to dry out between waterings. Additionally, avoid overhead watering, as this can promote fungal growth. If root rot is suspected, gently remove the fern from its pot and inspect the roots for signs of decay. Trim away any soft or mushy roots and repot the fern into fresh, well-draining potting mix.
Conclusion
Japanese Bird’s-Nest Ferns are versatile and visually striking indoor plants that add a touch of tropical elegance to any home or office space. By following proper pruning techniques, propagation methods, and troubleshooting tips, you can ensure your ferns thrive and flourish year-round. With their lush foliage and unique growth habit, Japanese Bird’s-Nest Ferns are sure to captivate plant enthusiasts and novices alike.
FAQS
What Is A Japanese Bird’s-Nest Fern?
The Japanese Bird’s-Nest Fern, scientifically known as Asplenium nidus, is a popular indoor plant admired for its striking foliage and low maintenance requirements. It belongs to the Aspleniaceae family and is native to tropical regions of Asia, including Japan.
How Do I Care For A Japanese Bird’s-Nest Fern?
To care for a Japanese Bird’s-Nest Fern, ensure it receives indirect sunlight, as direct sunlight can scorch its delicate leaves. Keep the soil consistently moist but not waterlogged, allowing the top inch of soil to dry out between watering sessions. It thrives in high humidity, so misting the leaves or placing a humidity tray nearby can be beneficial. Regularly clean its leaves to prevent dust buildup, and fertilize it lightly during the growing season.
What Kind Of Soil Does A Japanese Bird’s-Nest Fern Require?
Japanese Bird’s-Nest Ferns prefer a well-draining, rich potting mix that retains moisture without becoming waterlogged. A mixture of peat moss, perlite, and pine bark works well to provide adequate drainage and nutrients for the plant.
How Often Should I Water My Japanese Bird’s-Nest Fern?
Watering frequency for a Japanese Bird’s-Nest Fern depends on factors such as temperature, humidity, and the size of the plant. Generally, it’s best to water when the top inch of soil feels dry to the touch. Avoid overwatering, as this can lead to root rot, but ensure the soil remains consistently moist.
Can I Propagate My Japanese Bird’s-Nest Fern?
Yes, Japanese Bird’s-Nest Ferns can be propagated through division or spores. Division involves separating the plant into smaller sections, each with its own root system. Spore propagation is more complex and involves collecting spores from mature fronds and germinating them in a suitable growing medium. Both methods can be successful with proper care and attention to detail.
Is The Japanese Bird’s-Nest Fern Toxic To Pets?
According to the American Society for the Prevention of Cruelty to Animals (ASPCA), Japanese Bird’s-Nest Ferns are non-toxic to cats and dogs. However, ingestion may still cause mild gastrointestinal upset, so it’s best to keep the plant out of reach of curious pets.
What Are Common Pests And Diseases That Affect Japanese Bird’s-Nest Ferns?
Japanese Bird’s-Nest Ferns are relatively resistant to pests and diseases, but they can still be susceptible to issues such as scale insects, mealybugs, and fungal infections if not properly cared for. Inspect the plant regularly for signs of pests or disease, and treat any infestations promptly with organic insecticidal soap or horticultural oil. Avoid overwatering and ensure good air circulation around the plant to prevent fungal problems.